CRISPY ASIAN NOODLE SALAD

IMG_2542


With spring well and truly here on the Sunshine Coast, it is definitely time to rid yourself of all those wonderful winter warming recipes until next year and dig out the fresh and zesty ones like this gorgeous spring salad.

Not only is this healthy (omitting the fried noodles of course), it is so light, refreshing and just plain delicious that you will most probably find it in your favorite’s list before to long.

Great for BBQ’s with friends or just a light mid-week dinner. Give this zesty asian salad a go, I promise you won’t regret it.

Ingredients

1/2 Small red cabbage, shredded roughly

15 Snow peas, thinly sliced

1 Bunch pak choy, roughly chopped

2 Spring onions, sliced

1 Carrot, grated

1 Cup coriander, roughly chopped

1 Cup mint, roughly chopped

1/4 Cup sesame seeds, lightly toasted

250g Deep fried noodles

DRESSING INGREDIENTS

1/4 Cup soy sauce

1/4 Cup vegetable oil

Juice of 2 limes

2 Tlb rice wine vinegar

2 Tlb brown sugar

2 Tsp sesame oil

2 Tsp grated ginger

1 Tsp garlic

2 Birdseye chilli’s, finely diced

IMG_2532

PUTTING IT TOGETHER

Combine all salad ingredients in a large bowl except for the sesame seeds and fried noodles.

IMG_2534

In a jug place all dressing ingredients and whisk until dressing comes together.

IMG_2538

Pour the dressing over the salad and toss through to coat evenly.

Place in refrigerator until it is time to serve.

Just before serving toss through fried noodles and sesame seeds, keeping a few of the seeds aside to sprinkle over the top.

IMG_2541

I enjoy this served with my delicious Sweet Asian Beef Skewers.

IMG_2568

Serves 4 as a main meal.

NOTE* For a healthier version of this salad you can omit the fried noodles.

* Adding prawns or grilled chicken breast to this salad adds just that little bit more when having as a main meal.

ENJOY!


Flourless Chocolate Mud Cake

IMG_2450

With many of us going flour free for personal and health reasons  I decided it was time for me to post my recipe for this delicious ‘Flourless Chocolate Mud Cake’. This rich melt in your mouth piece of chocolate heaven is one of my favourite recipes that you too will now be able to make at home and pull out to impress at parties and get togethers or even just add to the kids lunch boxes as an extra special treat. This is delicious fresh out of the oven but for best results after it has cooled completely I leave it in an airtight container for 2-3 days before devouring. It is most certainly a hard thing to do but the rewards of waiting are worth it. The cake becomes denser, richer and seems to emanate all that is good about chocolate. Why not surprise ‘Dad’ by whipping this up for a father’s day treat this weekend.

INGREDIENTS

200g Unsalted butter, cubed

200g Dark chocolate

200g Caster sugar

200g Almond meal

5 Eggs (1 whole, 4 separated into yolks and whites)

PUTTING IT TOGETHER

Pre-heat oven to 170 degrees C. Grease and line a 20cm round spring-form cake tin with baking paper.

IMG_2431

In a medium to large saucepan melt your butter and chocolate together on a low heat until completely melted and you have a smooth shiny consistency.

IMG_2436

Remove from heat and cool slightly.

In a separate bowl place your sugar, 1 whole egg and 4 egg yolks. Mixing until well combined.

IMG_2433 IMG_2434

Once your chocolate mixture has cooled slightly add in your almond meal and mix well. Then add in the egg and sugar mix stirring until well combined.

IMG_2437

IMG_2439

IMG_2438

Take your egg whites and beat until a soft to medium peak is formed. Then fold through the chocolate mixture until all the white has disappeared and you have a thick chocolate cake mixture.

IMG_2441 IMG_2443

IMG_2444 IMG_2440

Fold mixture into prepared cake tin gently then place in pre-heated oven for 45 minutes or until a skewer comes out clean.

IMG_2445

Remove from oven and leave to cool slightly before removing from tin.

IMG_2446

Cool completely before storing in an airtight container. Can be eaten immediately but for best results store for 2-3 days before serving.

I love to eat this with a sprinkling of icing sugar and some double cream.

IMG_2456

ENJOY!


Hearty Pea & Ham Soup with Lentils

IMG_2341

There is nothing better on a cool but sunny winter’s day than sitting in my backyard with a good book and a bowl of my delicious Pea & Ham soup while soaking up some vitamin D.

Wednesday this week was my only chance to have a little down time while the hubby was at work and my two children were at school and kindergarten, so have a guess what I did with that down time. You got it! I made a huge batch of my soup then sat in the sun and got out my kindle for a whole hour. This soup is so delicious I ate it two days in a row before deciding to freeze the rest for those other sunny days this winter where I just might need a bowl of soup.

Time to get those ham hocks out of the freezer people and start cooking. This is the perfect recipe to add to your winter repertoire.

Recipe makes around 4 litres so there is plenty to eat now and freeze for later.

Ingredients

2 Brown onions, diced finely

2 Carrots, peeled and cubed

1 Tsp ‘Gourmet Garden’ garlic paste

2 Tlb olive oil

500g Green split peas

500g Red lentils

2 Large ham hocks

4 Litres Vegetable Stock

PUTTING IT TOGETHER

In a large stock pot saute onion, carrot and garlic with the olive oil until onion is translucent and garlic aromas fill the air.

IMG_2304 IMG_2307 IMG_2308

Place your ham hocks, split peas and lentils into the stock pot.

IMG_2314 IMG_2305

Pour in your vegetable stock slowly and give a gentle stir before bringing to the boil.

IMG_2310

Once your stock has come to the boil, reduce to a simmer. Place a lid on halfway and keep on a medium simmer for approximately 2-3 hours until the lentils and peas are mush and the meat is tender and starting to fall away from the bone.

This is what it should look like.

IMG_2322

Remove the ham hock and any meat from the liquid.

Use a stick blender to blend the remaining ingredients in the stock pot.

Take your ham hocks, remove any fat and discard. Cut any remaining meat away from the bones (discarding the bones also) and place in a food processor blitzing briefly to dice the meat evenly.

IMG_2330

Place the meat back into the stock pot with the liquid season to taste and bring back to a simmer for 10 minutes.

IMG_2327

Serve piping hot with freshly baked bread.

ENJOY!

IMG_2345

Cajun Spiced Haloumi, with Asparagus and Prosciutto

IMG_2207

Here is a perfect little snack that is great anytime of the day. Serve with poached eggs for breakfast, have as a quick and easy lunch or amaze your friends and family with these as finger food at a party. What ever your choice these delightful bites with just a hint of spice (the kids will even eat them) are a delicious yet healthy treat the whole family can enjoy.

INGREDIENTS

180g Block Haloumi Cheese

1 Tlb Cajun Seasoning

9 Spears Asparagus

9 Slices Prosciutto, Thinly Shaved

2 Tlb Olive Oil

IMG_2194

PUTTING IT TOGETHER

Slice your block of haloumi into 9 equal slices and place in a bowl with cajun seasoning and olive oil. Combine to coat well and set aside for 5 minutes.

 IMG_2195

 Rinse asparagus spears and trim off the woody ends before blanching in a pot of boiling water until your asparagus is a brilliant green colour and cooked ‘al dente’ (alternatively if you have a steamer you can cook the asparagus in it instead of boiling water). Remove from heat and drain well. Set aside to cool slightly.

IMG_2200

 Heat a frying pan on a medium high heat and cook haloumi until golden on both sides. Remove from pan and cool slightly.

IMG_2201

 Now comes the fun part.

Take one slice of prosciutto lay it flat on a chopping board, at one end place a haloumi slice then an asparagus spear on top and roll to the end.

IMG_2202IMG_2203

 Repeat this process until all ingredients are used up. Place on a platter and serve immediately.

ENJOY!

IMG_2207

Perfect Pizza Bases

IMG_0583

There is simply nothing better than sitting around a fire pit with friends and family on a chilly winter’s eve with a bottle of red and some delicious made from scratch pizza’s. Or even lounging around on the couches with the kids on the weekend watching movies and eating pizza and popcorn. Whatever the situation if it involves pizza here is the perfect recipe for you.

I am a big believer in less is best when it comes to pizza making. You don’t need a huge amount of dough to make a great base and when it comes to topping’s the Italians have it right. Pick a couple of delicious ingredients, combine them on an equally delicious handmade pizza base and you have a winning meal every time.

Pizza to me is not about overloading your tastebuds with huge amounts of ingredients all in one go but about combining two or three flavour inducing elements and letting them meld together in the cooking process to create something beautiful.

Below is the recipe for the perfect pizza base and I have also included a few suggestions for toppings that are my favourite at the moment.


Ingredients

500g Strong Bread Flour

1/2 Tsp sea salt flakes

7g Sachet yeast

1/2 Tlb sugar

325ml Luke warm water (30 degrees C)


PUTTING IT TOGETHER

Place your water together with yeast and sugar in a jug, stirring well to combine with a fork and leave to sit for 2-3 minutes.

IMG_2011[2]

Combine your flour and sea salt in a large bowl and make a well in the centre.

IMG_2012[2]

Add the liquid mixture to the well and bring together slowly from the middle using a fork until a dough forms.

IMG_2014[1] IMG_2015[1] IMG_2017[1]

Flour your hands lightly and knead either in the bowl or on a clean lightly floured bench for 6 minutes. (I find kneading it in the bowl saves on the mess).

Cover dough in bowl with cling wrap and set aside in a warm, draft free spot for approximately 20 minutes or until doubled in size.

IMG_2018[1]

Once dough has proved, place on a well floured bench. Cut into 4 equal pieces.

IMG_2021[2]

Knead each piece lightly to remove any large air bubbles  shape into a round disc then roll out to size.

IMG_2022[2]

Once bases are ready pre-heat oven to 250 degrees C. Top with ingredients of your choosing and cook for approximately 12 minutes or until base is golden and topping is cooked.

This recipe will make 4 pizza bases.

NOTE: You can freeze these individually before rolling out. Just lightly flour each portion and place in a zip lock bag.

Now for a few of my favourite toppings at the moment.

IMG_2027[1]

Shaved Ham, Kale, Red Onion & Boccocini on a Tomato Base.

IMG_2029[1]


Prawns, Homemade Pesto, Char-Grilled Capsicum & Boccocini on a tomato base.

IMG_0581

Saute Garlic Mushrooms, Goats Cheese & Rocket.

IMG_0589

Tandoori Chicken, Shaved Cucumber, Snow Pea Shoots & Greek Yoghurt on a Tomato Base.


Quinoa & Parmesan Coated Chicken Schnitzel

IMG_1932

I’ve been trialing news ways of late to make the old new and the new a lot healthier than the old version. This is one of the ones I have come up with that is great for those who love chicken schnitzel but are either gluten intolerant or just trying to cut out bread and flour.

The great thing with these are they are a fantastic year round dish. In summer perfect with a light salad for those hot and humid days. In winter I love it served up with a mash of some sort and some steamed green vegetables.

For all my mummy followers out there, these are definitely a hit with the kids as well, I found that out tonight when the whole plate was devoured by 2 very hungry children and one very fussy husband.

This serves 4-6

Ingredients

2 Chicken breast

2 Eggs, beaten lightly with a dash of water

150g Quinoa flakes

120g Grated parmesan

Italian herb mix for seasoning

Canola Spray (if using airfryer or oven)

Vegetable oil (if shallow or deep frying)

PUTTING IT TOGETHER

Take your chicken breasts and slice it thinly. Usually this will give you 4-6 slices per breast if cut correctly as shown below.

IMG_1911 From this.

 IMG_1910 To this.

In a bowl beat your eggs lightly adding a dash of water. Set aside.

IMG_1912

On a plate combine half your quinoa, parmesan and enough of the italian herbs to season to your liking, (we do this to split the crumbing process in two as I find the mix can get clumpy after a while and this gets rid of that problem by doing it in two batches).

IMG_1919

Now to crumb, dip your chicken into the egg wash and then lay in the quinoa mixture. Pressing on both sides until the slice is completely covered.

IMG_1921 This is how they should look.

Repeat the process until all the chicken is crumbed and lay out on a tray lined with baking paper.

Now comes the cooking process. You can fry these (deep or shallow) in some vegetable oil until golden brown and cooked through. They won’t take too long if you’ve sliced them thinly.

OR

You can cook these in an airfryer or oven.

I cooked mine in my Philips Airfryer (which by the way is one of my new toy’s I am absolutely in love with).

Pre-heat your airfryer or oven to 180 degrees C. Line your tray or basket with baking paper and spray your schnitzels with canola oil on both sides before laying on your tray. Once your device has come to temperature, place in your schnitzel and cook for approximately 20-25 minutes making sure you turn them halfway through so that they become golden and crisp on both sides.

IMG_1923

Serve immediately with sides of your choice.

ENJOY!

IMG_1931

Fennel, Char-Grilled Capsicum & Goats Cheese Salad

IMG_1691

There is something about this salad that just says winter to me. I know traditionally salads are very much a spring or summer dish but I have been playing around lately with the idea of making more winter friendly salads that don’t have to be all about roast vegetables (though I admit I do love those too).

This salad for me is also a first in regards to my use of fennel in it. I have never been to big a fan of fennel due to it’s very strong and distinct aniseed flavour and smell. Many people have also said the same thing to me. The joy with fennel though is once it is cooked through that flavour becomes a delightfully mild yet mouthwatering taste I can actually handle and enjoy.

So as the weather cools down, don’t put away the salad bowls yet. Try this salad and you too will be wanting to add more to your winter diet.

Ingredients

1 Fennel bulb, tops removed and sliced into 1cm slices

1 Eggplant, sliced into 1cm slices, salted lightly for 1 hr, rinsed and patted dry

1 Red capsicum

200g Grape tomatoes

120g Rocket

120g Goats cheese

Orange & Seeded Mustard Dressing

50mls Orange concentrate

50mls Extra virgin olive oil

2 Tsp seeded mustard

IMG_1646 IMG_1650 IMG_1660

PUTTING IT TOGETHER

Heat your grill plate and hot plate on your BBQ to a high heat.

In a large bowl place your eggplant and capsicum and drizzle oil over, mixing through until every piece has a light coating.

In another medium sized bowl coat your fennel lightly with oil.

On the char grill plate of your BBQ place the eggplant and capsicum.

Cook the eggplant both sides until tender. Cook the capsicum both side making sure that it blackens and blisters slightly.

Place your Fennel on the flat plated part of the BBQ cooking both sides until it has a light golden tinge and is tender. The fennel should no longer be a crisp bright white but more of a opaque off white colour.

IMG_1354

Remove Fennel and eggplant from BBQ, placing in separate bowl to cool to room temperature.

When the Capsicum is blackened and blistered, remove from the BBQ place in a ziplock back for 10 minutes, so that it will soften, resulting in a delicious char-grilled capsicum.

While your BBQ is still quickly throw the tomatoes onto the hot plate, moving around until the skin blisters slightly. Don’t cook too long as you still want to have firm tomatoes just with a slightly blistered skin.

Cool everything to room temperature before putting your salad together.

To make the dressing place your orange concentrate, olive oil and seeded mustard and whisk together until the mixture emulsifies and comes together.

In a large bowl place your rocket and grape tomatoes. Slice the capsicum, eggplant and fennel into thin strips and place in bowl also.

Crumble the goats cheese through your salad and dress just before serving.

This serves 4.

ENJOY!

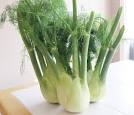
fennel


Pesto Chicken Skewers

IMG_1469

Now that you’ve made your own delicious pesto, why not use it to make these delicious chicken skewers.

As with all my recipes so far they are simple and quick to make yet full of flavour.

The kids absolutely love these and they are sure to be a hit.

Not only can they help you make them as an afternoon activity this weekend, they will devour them in seconds and you can rest easy knowing that you have fed them goodness on a stick.

These are also great for BBQ’s when you are having friends over or birthdays when you need to feed the hoards.

This dish is a winner in my family’s recipe book.

Ingredients

6 Chicken Thighs, Cubed

1 x Basil Pesto recipe, follow link below  for recipe (http://staceysgourmetkitchen.com/2014/05/24/basil-pesto/)

20 Wooden Skewers, Soaked in Water

Baking paper for cooking


PUTTING IT TOGETHER

In a medium sized bowl place your cubed chicken thigh and basil pesto. Cover chicken completely with the pesto and marinate for at least 30 minutes.

IMG_1464

After you have left your meat to marinate, divide the meat evenly between skewers, sticking cubes of the chicken onto the pre-soaked skewers. This should make approximately 20 skewers.

IMG_1465

Preheat your BBQ.

Before cooking lay a sheet of baking paper onto the plate of the BBQ. This is what you will cook your skewers on to prevent the marinade sticking and burning on your hotplate.

IMG_1467

Cook until chicken is a delicious golden colour and cooked through completely, the timing on this will depend on your BBQ.

IMG_1457

Enjoy!

Basil Pesto

IMG_1453

I absolutely adore a fresh basil pesto and could eat it everyday of the week.

I get such great satisfaction out of running up to my garden to pick a bunch of fresh basil and whipping up this recipe, whether it be for a dip, a delightful summer pasta dish or marinating chicken. Pesto is such a versatile and flavoursome accompaniment you can use for many dishes.

Now is the perfect time to get in your garden if you don’t have it already and plant some basil. You won’t regret having this beautiful and versatile herb in your garden.

Most recipes you’ll find for pesto have more nuts and parmesan than this one but I love that fresh flavour of the basil so cut back a little on the other ingredients to bring that to the fore front of your taste buds.

Ingredients

50g Fresh basil

1 Clove garlic, sliced

25g Pine nuts, lightly toasted

25g Paremsan cheese

1/2 Cup olive oil

Sea salt for seasoning

IMG_1582


PUTTING IT TOGETHER

Rinse basil leaves then pat dry with a clean tea towel to remove any excess moisture.

Place basil, sea salt and garlic clove in your food processor and blitz for 30-40 seconds.

IMG_1441

Scrape down the sides, add toasted pine nuts then blitz for another 30-40 seconds.

IMG_1443

Add in Parmesan cheese, blitz for 10-20 seconds then scrape down the down the sides before adding your olive oil and blitzing for a further 10 seconds.

IMG_1445

Season with more salt if desired.

IMG_1595

NOTE: To keep pesto from turning brown, store in the fridge with a layer of olive oil coating the top. Pesto can also be frozen for up to 3 weeks.


.


Spinach & Ricotta Cannelloni

IMG_1394

This is one of my favourite winter warming dishes at the moment. Using my home-made riccotta cheese this is a meal everyone will love. A little bit more effort is involved in this than most of my recipes but the result as you will see is worth it.

Try it for yourself and see!


Ingredients 

3 x Home-made Ricotta Cheese approximately 500g, follow the link below to find my delicious recipe made with Maleny Dairies Milk.(http://staceysgourmetkitchen.com/2014/05/13/home-made-ricotta-cheese/)

1 Bunch silverbeet, white stems removed

1 Pack fresh lasagna sheets

2 Tsp Massel’s powdered vegetable stock

1/2 Cup grated parmesan

Cheese and fresh breadcrumbs for topping

Bechamel Sauce Ingredients

1 Litre full cream milk

50g Butter

4 Tlb plain flour

50g Parmesan cheese

Salt and pepper to season.

PUTTING IT TOGETHER

Take your spinach leaves, rinse well to remove any dirt granules then shred finely.

IMG_1350

Blanch briefly in a pot of boiling water til leaves are brilliant green in colour, then drain well and set aside to cool slightly.

IMG_1353

In a large bowl, place your ricotta cheese, Massel’s vegetable stock, parmesan cheese, and cooled silverbeet.

Mix through until well combined.

IMG_1368

Taking your lasagna sheets, fold each one in half then cut to make two pieces.

IMG_1369

IMG_1370

Lay each half sheet out and lay a line of the ricotta mixture across, being careful to not overfill.

IMG_1371

Roll carefully, before placing in your baking tray and repeating until all your mixture is used up.

IMG_1372

Place your tray of cannelloni in the fridge while you make your bechamel sauce.

MAKING THE BECHAMEL SAUCE

Melt your butter over a medium high heat until butter is melted and foaming slightly.

IMG_1375

Add in the flour and stir with a spoon until butter and flour come together to make a paste. Cooking for 1-2 minutes until it starts to dry out a little (be careful not to let it stick to the pan or it might burn).

IMG_1376

Gradually add in milk a little at a time, stirring constantly until a smooth sauce is formed (you can use either a wooden spoon or a whisk for this).

IMG_1377

IMG_1378

Cook on a slow simmer for approximately 10 minutes until sauce thickens and coats the back of a spoon. Remember to stir constantly at this stage to stop sticking or burning.

Stir through parmesan cheese and season with salt and pepper.

Now you have your bechamel sauce done it is time to pour it over your tray of cannelloni.

IMG_1379

Top with grated cheese and a smattering of fresh breadcrumbs then place in a pre-heated oven at 180 degrees C for 35-40 minutes, or until golden brown on top.

IMG_1392

This recipe makes approximately 12 cannelloni tubes.

I enjoy this served with a light salad or steamed vegetables.

ENJOY!


Turning Gourmet into Everyday